
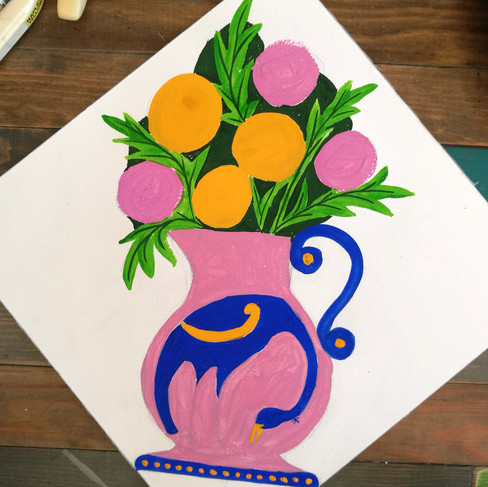
Vase Illustration in Gouache
- May 1, 2022
- 1 min read
For this project you will need:
· 300gsm watercolour paper
· Sketching pencil
· Gouache paints (brushes, water pot etc.)
Colours: Pink, blue, yellow, red, white, light and dark green.
This project can take anywhere from 1 to 2 hours, depending on the amount of detail you want to add.
*If you have never used gouache paint before then check out my Gouache beginners guide free lesson.
I was inspired by Emily Maude and her fantastic illustrations of ceramics.

I wanted to make a ‘stand-up’ card/cut-out to send in the post so I worked on a heavyweight watercolour paper.
First, I created a set of sketched ideas and once I had decided on the composition I sketched it on to my watercolour paper.
Next, I blocked in each of my separate colours. Blue, then pink.


Yellow, then light green.


I want to be able to cut around the outside without having to cut tiny areas and without the work flopping over. So, I begin to fill in the background between the flowers in a dark green.
Once all the basic shapes are blocked in I can begin to add details and smaller shapes.


I continue to add details with a very small brush. This also helps to break up areas of flat colour, such as the ‘leaf’ background.
Finally, I load my brush with white gouache and add small hi-lights back into the illustration.


To finish I cut out my design and add a small card stand to the back to support it.
I can’t wait to see what you produce.
Take a photograph and add it to my Student Chatroom!
Download the tutorial here:

Comments